


From November 2021, the google play console forced the developers to deploy the Android app, targeting API 30(Android 11). The Android 11 consists of some privacy features, which could update some existing features, which we used earlier in Android 10 and below, like Scoped Storage enforcement, One-time permission, Background location access, etc.
 In React native world, most of the developers are request for updating some packages such as RN-fetch-blob, react-native camera roll, etc. (which requires storage permission for writing data to the file manager)
Today, we are going to learn about how to write files to android 11 external storage(Using react-native). So let's get started.
Android Native Module:
The native module system exposes instances of Java classes to Javascript as JS objects, thereby allowing you to execute arbitrary native code from within JS. Here, we are going to create a simple Android native module for accessing storage permission in Android 11.
Setup:
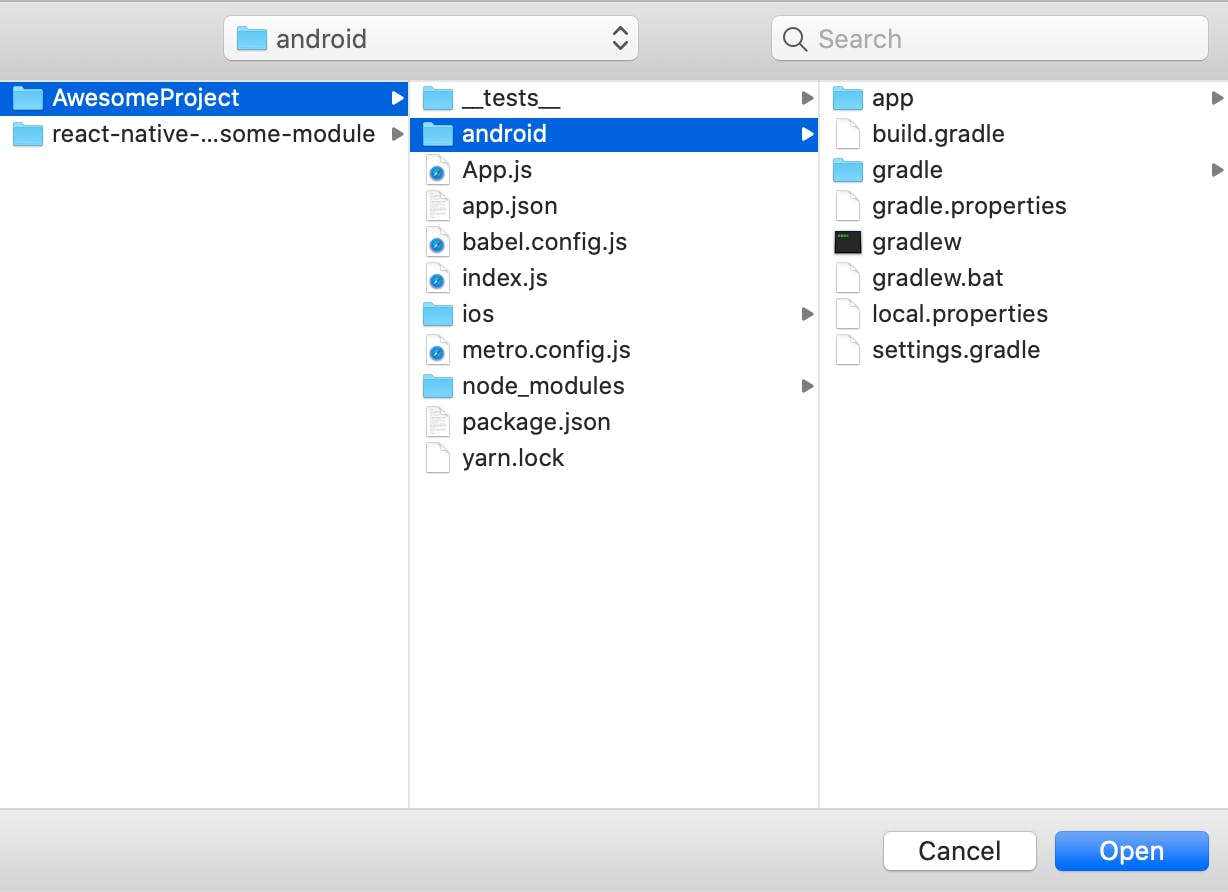
Once the react-native project setup was completed, open up the Android project within your React Native application in Android studio.
 Check the target SDK version is 30 in android/build.gradle file,

Add permissions in the Android manifest file (android/app/src/main/AndroidManifest.xml) for accessing the file system on your device.
 Here, the WRITE_EXTERNAL_STORAGE permission won't work in Android 11, which targets SDK version 30. So, add MANAGE_EXTERNAL_STORAGE permission in the Manifest file. And the READ_EXTERNAL_STORAGE permission will remain the same, it will work for both Android 10 and Android 11.
Create a Custom Native module file:
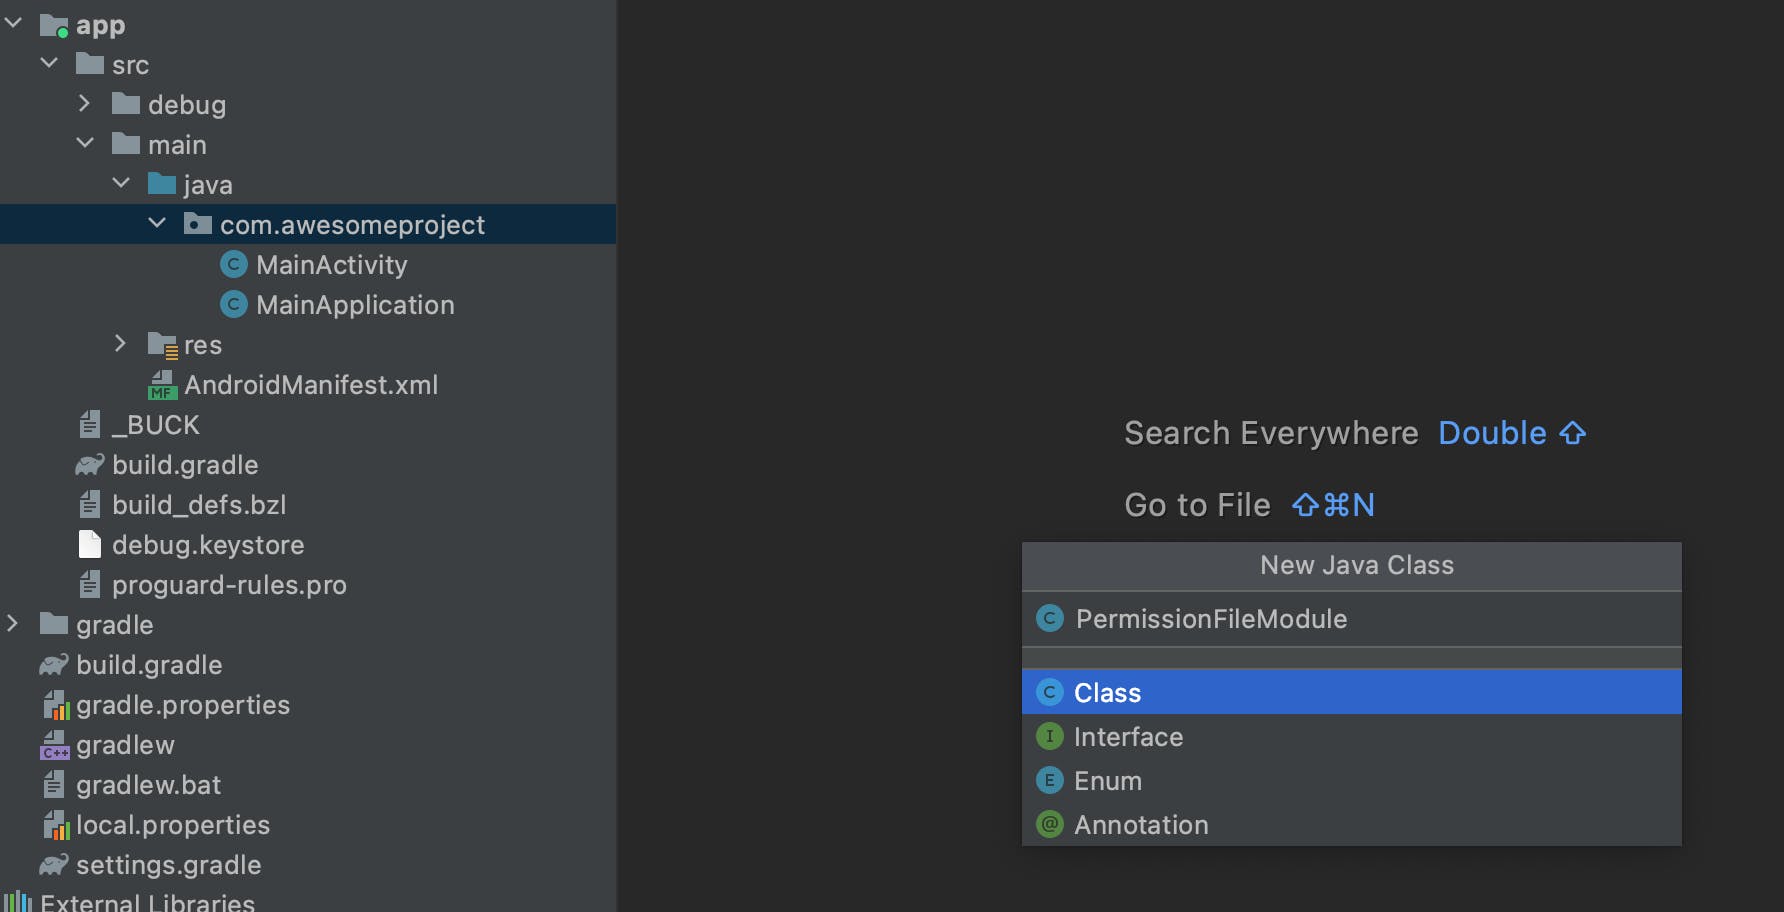
The first step is to create the PermissionFileModule.java java file inside android/app/src/main/java/com/your-app-name/ folder. This Java file will contain your native module Java class.
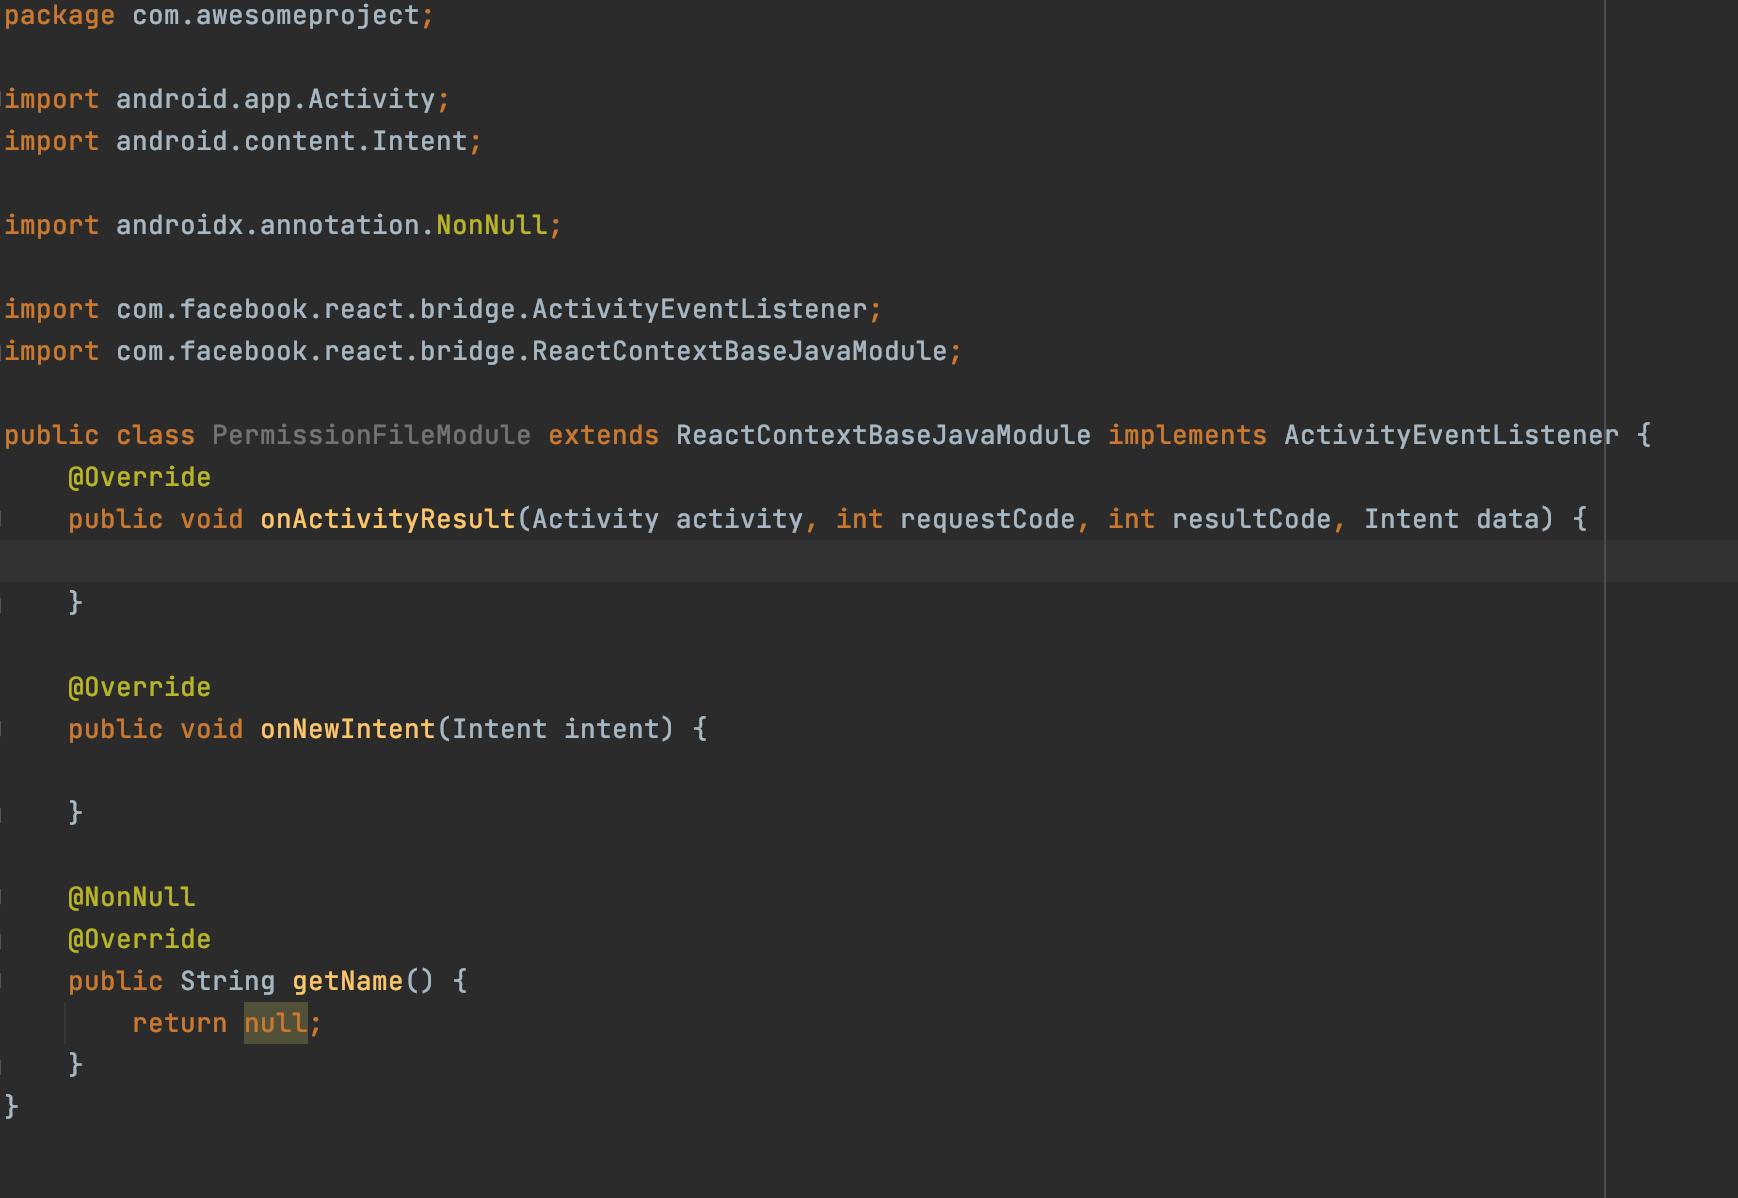
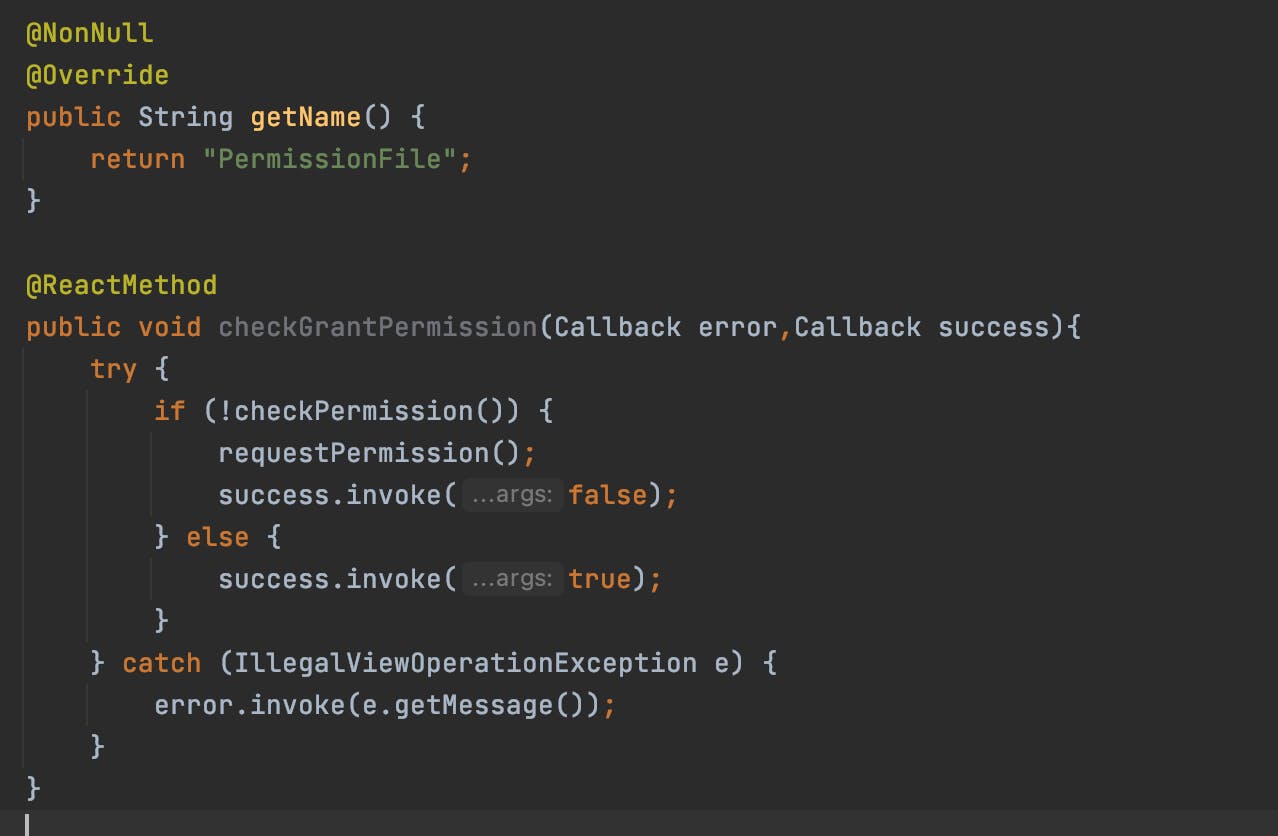
 Then, extends ReactContextBaseJavaModule and implements their methods. Then give the module name in the getName() method(The native module can then be accessed in JavaScript using its name)
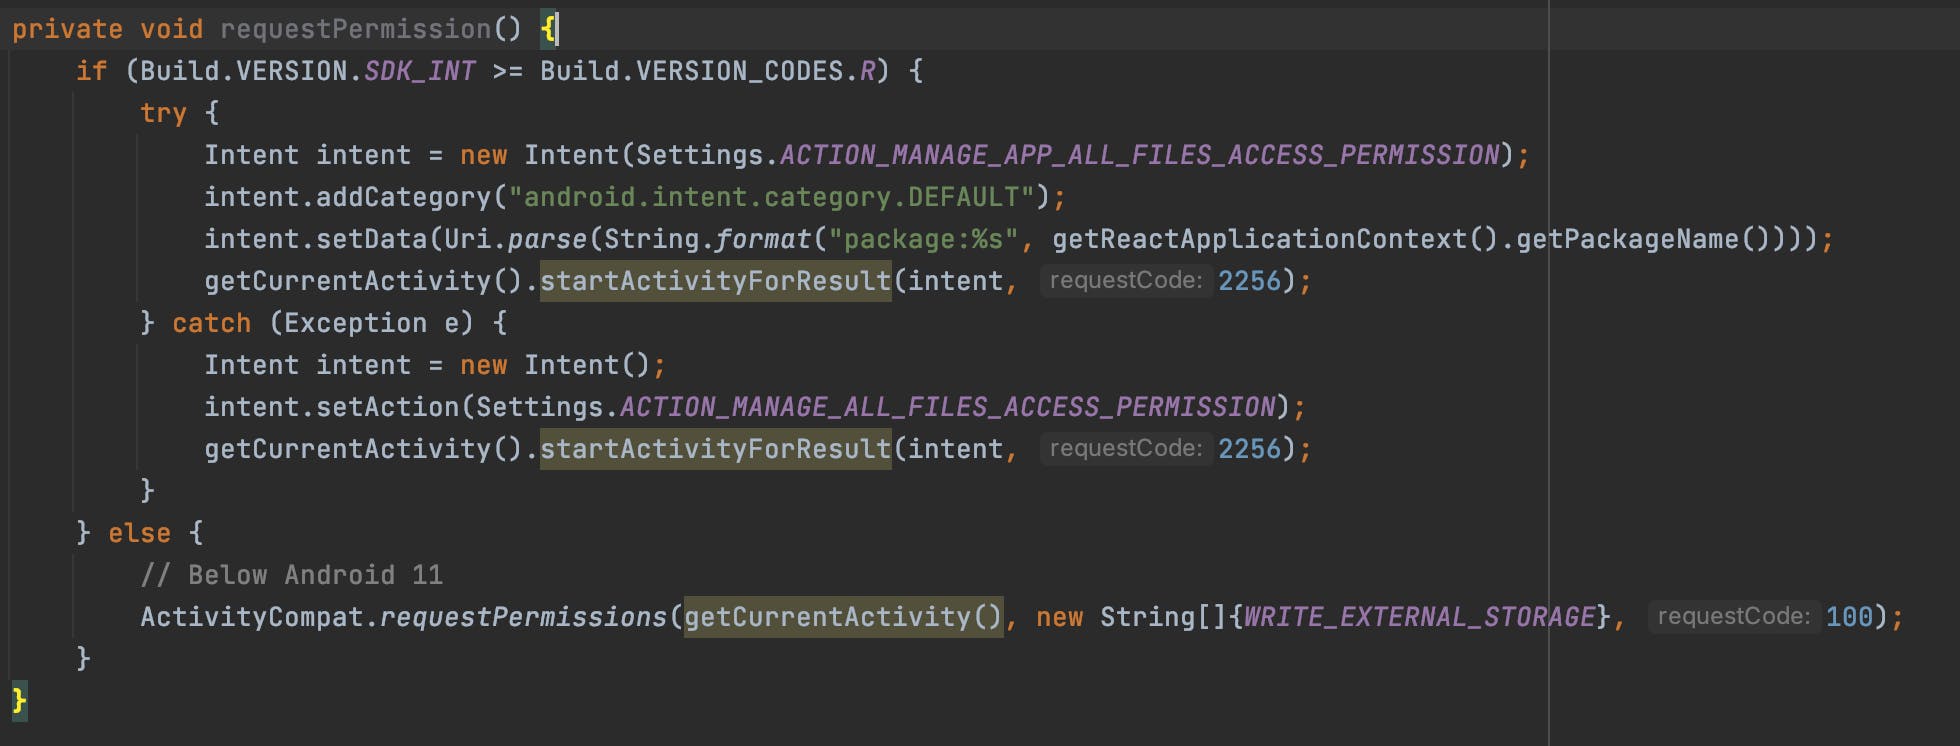
 Then, create two methods checkPermission() and requestPermission(),
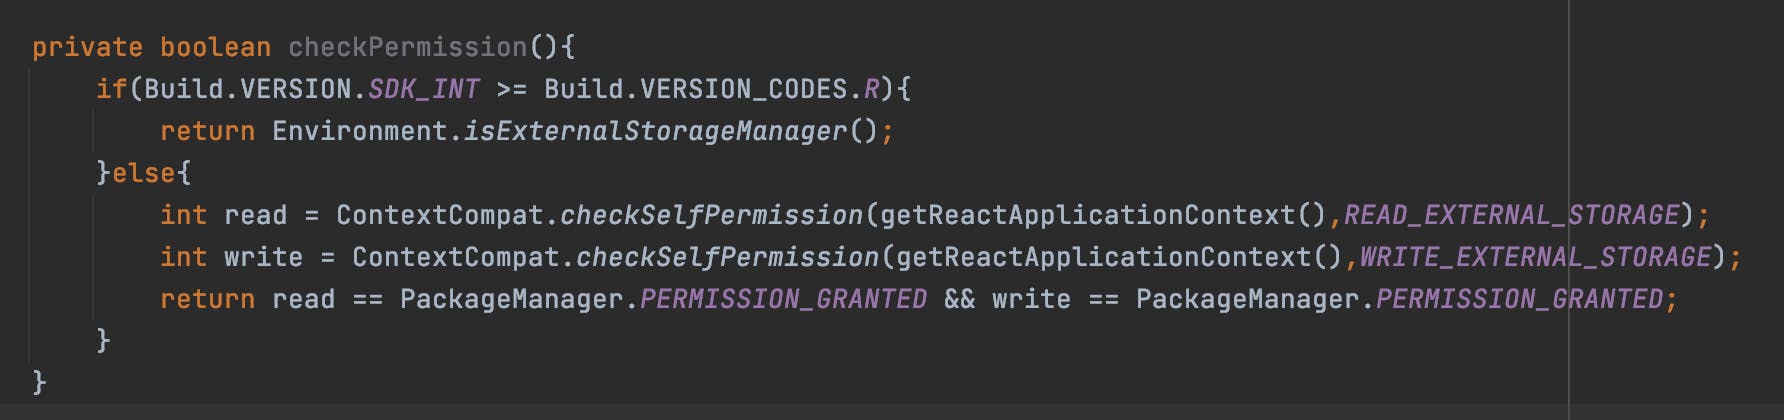
 Next, you will need to create a native module method, all native module methods must be annotated with @ReactMethod. And check the permission for accessing file manager.
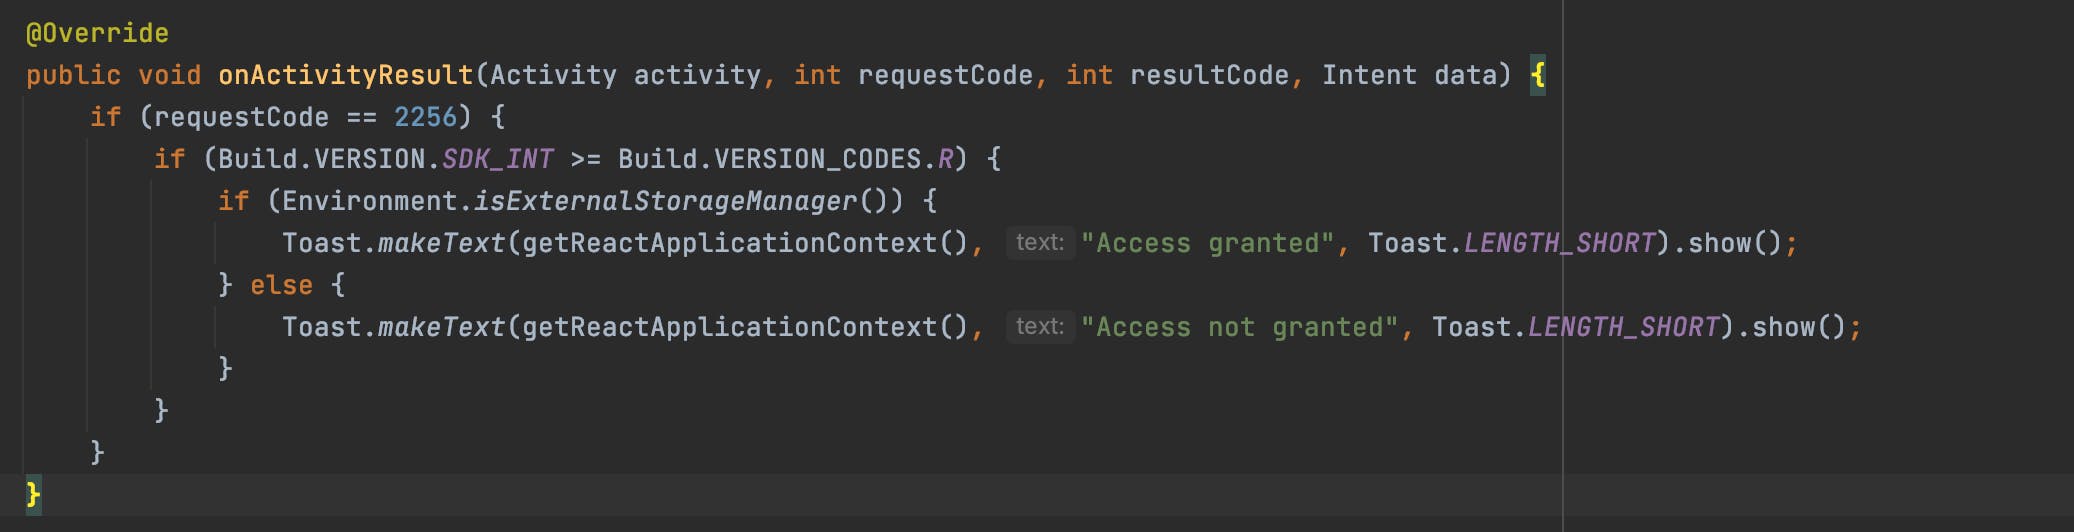
 Next, handling the permission callback in the onActivityResult() method. By this method, we can start another activity from the current activity to get the result for it.
Register the Module:
Once a native module is written, it needs to be registered with React Native. In order to do so, you need to add your native module to a ReactPackage and register the ReactPackage with React Native.
To add your Native Module to ReactPackage, first create a new Java Class named PermissionFilePackage.java that implements ReactPackage inside the android/app/src/main/java/com/your-app-name/ folder:
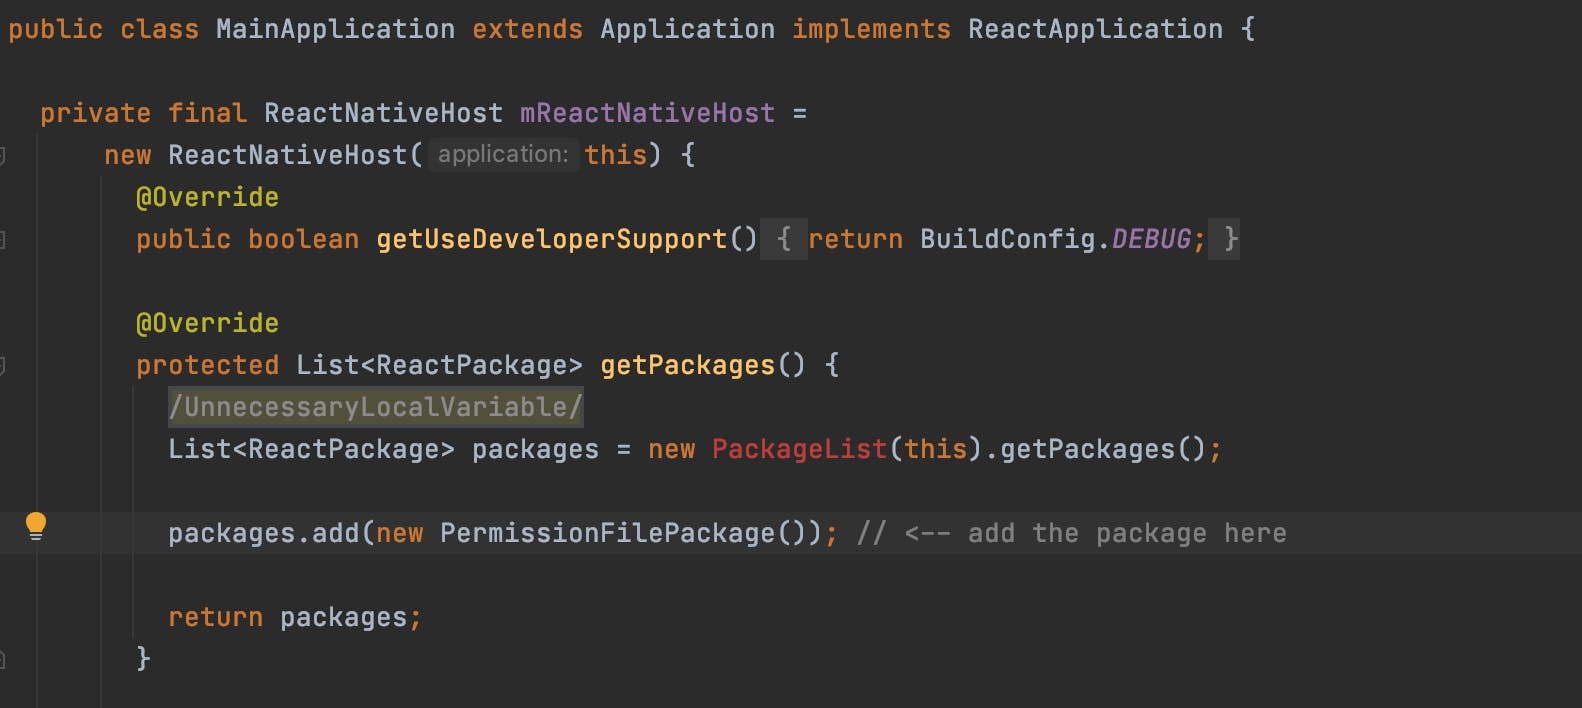
 To register the PermissionFileModule package, you must add PermissionFilePackage to the MainApplication.java as an additional package.
 You have now successfully registered your native module for Android!
Accessing PermissionFile in JS component:
In your React native component, call the permission file like this,
import React from 'react
import { NativeModules, PermissionsAndroid, Platform, StyleSheet, Text, TouchableOpacity, View } from 'react-native'
const App = () => {
const PermissionFile = NativeModules.PermissionFile;
const accessFiles = () => {
if (Platform.OS === 'android') {
checkingManagePermission();
}
}
const checkingManagePermission = () => {
if (Platform.Version >= 30) {
PermissionFile.checkGrantPermission(
err => {
if (err) {
console.log('Permission Error', err);
}
},
success => {
if (success) {
// You can use RN-fetch-blog to download files and storge into download Manager
console.log('Access granted!');
}
}
);
} else {
// For API 29 and below (Android 10 and below)
checkingWritePermission();
}
}
const checkingWritePermission = async () => {
try {
const granted = await PermissionsAndroid.requestMultiple(
[PermissionsAndroid.PERMISSIONS.WRITE_EXTERNAL_STORAGE,
PermissionsAndroid.PERMISSIONS.READ_EXTERNAL_STORAGE]
);
if (granted['android.permission.WRITE_EXTERNAL_STORAGE'] === 'granted' &&
granted['android.permission.READ_EXTERNAL_STORAGE'] === granted) {
// You can use RN-fetch-blog to download files and storge into download Manager
console.log('Access granted!');
} else {
console.log('Access to external storage failed.');
}
} catch (error) {
console.log('Access to external storage failed.');
}
}
return (
<View>
<TouchableOpacity onPress={accessFiles}>
<Text>Access File system!</Text>
</TouchableOpacity>
</View>
)
}
export default App;
I hope, the above article will help a lot of developers to implement scoped storage permission in their projects. This is one way of implementing scoped storage permission in react native 😅 Please comment it out, if you have any other way of accessing external storage in Android 11 by using React native 👏
If you like the content, please share this article with your friends.
Thanks for reading! Be safe at home!
Happy coding...